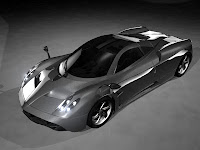
In this post I'm going to show you car rendering and lighting techniques which is very useful for studio background renderings. In here we use special software called HDR Lighting Studio. You can download it by clicking here.
Open your scene and put some point lights which is focusing the car. Turn on raytracing shadows. Assign some nice textures to the ground and lower the reflectivity. Open render settings window and choose Render Using as Mental Ray.
In here I use following values for point lights.
Cone Angle- 45.369
Penumbra Angle- 10.000
Dropoff- 16.585
Go to File->Export All.... Choose File type as mentalRay. As a beginner you can use default settings. Click Export All. Open HDR Lighting Studio. Drag and drop your exported file to LiveLight window of the HDR Lighting Studio.
Now you can create and place lights of your choice.
In here I use four lights.
There are many light attributes. Assign suitable values. Turn off BACKGROUND


No comments:
Post a Comment